
SOMETHING NEW
This post marks the beginning of a new recipe resource to be found here on the Spring Forest Farm website. We invite you to return on the first Monday of each month to find the latest guide for cooking with beef. More than just a recipe, this will be a place for you to learn to use the varied and nutritious cuts of meat, organ, and bone that are often missing from a typical grocery store.
BEGIN AT THE BEGINNING
To build a volume of recipes, one must really start at the beginning with fundamentals that will contribute to more complex recipes down the road. In the case of cooking with beef, a savory nutrient-dense stock is a must-have foundational ingredient.

STOCK VS. BONE BROTH
Let’s begin by acknowledging the difference between stock and the current health-food craze, bone broth. If you listen to a professionally trained chef like Shelley Young of The Chopping Block in Chicago, you will hear that “bone broth” is a fad name for stock. According to her, chefs have been making stock for centuries and the term “bone broth” only appeared a few years ago as the paleo diet rose to fame. She says that from a chef’s perspective “broth” is the liquid formed by cooking meat and vegetables in water. It’s not made for a purpose, but is the byproduct of cooking something else. “Stock,” she says, is what you make from bones, meat, and vegetables to use as the building block for soups and sauces.
Sarah Ballantyne, guru of the paleo movement, has a different opinion. According to her, “stock” is bones, meat, and possibly vegetables simmered in water for one to several hours, producing a thin, light-colored liquid. By her definition, “bone broth” typically uses more connective tissue than stock and is cooked for much longer….up to 40 hours! This produces a thick, gel-like, golden broth that is more nutrient dense than typical stock.
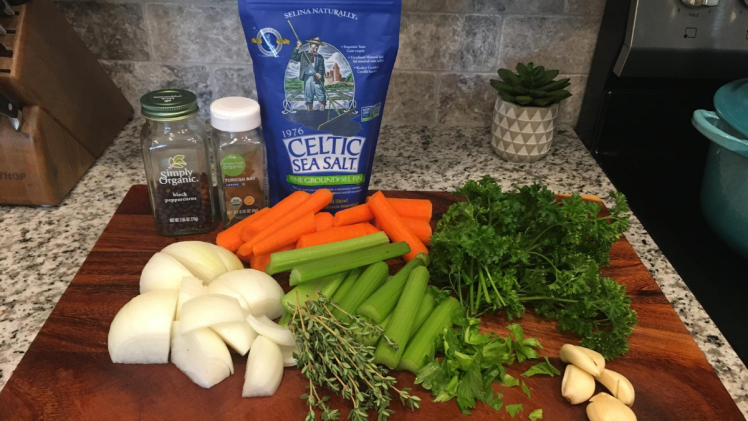
Good stock starts with good ingredients. You can sub dried herbs, but the inclusion of fresh, organic herbs lends a more vibrant aroma to your stock.
Our stock will serve as a building block for soups, sauces, and other recipes. It will be flavorful and definitely not just a “byproduct.” Working from the paleo definition, it will be a true stock, rather than a bone broth.
HEALTH BENEFITS
Before we jump to the recipe, let’s look at the health benefits of homemade grass fed beef stock. Cooking bones for stock or bone broth releases minerals like calcium, magnesium, potassium, and phosphorus. Because these are in a liquid form, they are easily absorbed by the body. Stock is also rich in amino acids and collagen, though the density of collagen will be greater the longer the liquid is cooked….like in the case of bone broth.
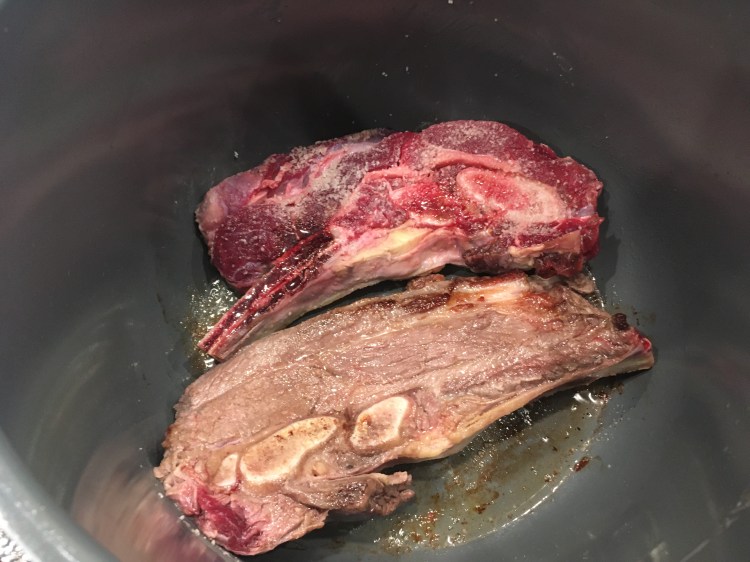
Roasting or searing the bones adds a rich caramelization to the broth. Those little brown bits on the bottom of the pot or pan equal added flavor.
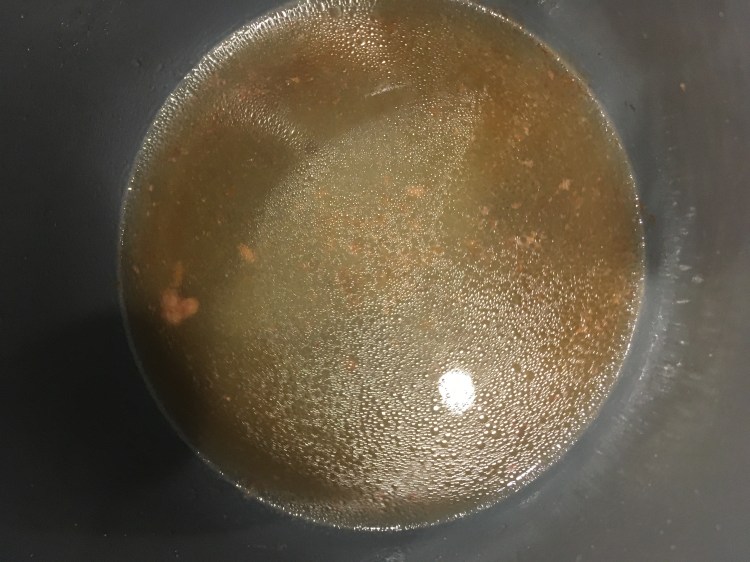
Be sure to deglaze the pot or pan to gain the most benefit from your time spent roasting or searing.
HEALTH CAUTIONS
Even as there is benefit to stock and bone broth, there can also be danger. The longer you cook these, the higher both histamine and glutamate will rise. This may be fine for some, but those who struggle with histamine intolerance will find a long-cooked bone broth to be troublesome. (This is why I went back to stock after years of making bone broth.) Excess glutamate is often troublesome for children, but can also affect adults. Both histamine intolerance and excess glutamate cause symptoms such as brain fog, headaches, and digestive distress. Whether you’re making stock or bone broth, you can reduce potential symptoms by reducing cook time.
ABOUT THE PROCESS
I make stock at our home about once a month using the grass fed beef bones from Spring Forest Farm. I use the same bones in my instant pot to make three batches of stock in one day. The first is always the darkest and most flavorful. I reserve that stock for making soups. The other batches I use for everyday kitchen use. You can just make one large batch of stock and stop, but I find there is still some flavor left in those bones, so I try to get the most from them. I freeze all of my stock so that it lasts throughout the month.
Stock is a five step process: roast/sear, deglaze, add, fill, cook. Preserving is another three steps: ladle, cool, freeze.
Enjoy the recipe. Adapt and make it your own!
BEEF STOCK

In the case of cooking with beef, a savory nutrient-dense stock is a must-have foundational ingredient.
Ingredients
– 1 Tbsp Olive Oil
– 1 pkg beef soup bones
– 1 large onion, rough chopped
– 3 large carrots, rough chopped
– 6 stalks celery (with the leaves), rough chopped
– 3-4 cloves garlic, smashed
– 1/2 bunch or large handful fresh parsley
– a few sprigs of fresh thyme
– 2 bay leaves
– 1 tsp black peppercorns
– 3 generous pinches sea salt (I like Celtic Sea Salt)
– 5 quarts purified water (this varies by the size of your cooking device)
Directions
- Roast or Sear the bones.
- Stock Pot or Crock Pot: Place the bones and the chopped onion, carrots, and celery into a lightly oiled roasting pan. Roast at 375 for about an hour.
- Instant Pot: Lightly oil the bottom of the pot and hit “sauté.” Sear the bones, turning to brown on all sides.
- Remove the contents and deglaze the pot/pan.
- Stock Pot or Crock Pot: Dump the contents of your pan into your pot. Pour a cup of water into the pan and scrape up the brown bits from the bottom. If you need to (and your pan can take direct heat), place the pan over a burner to loosen the brown bits.
- Instant Pot: Take out the bones and set aside. Pour a cup of water into the Instant Pot and scrape the brown bits from the bottom.
- Add all ingredients to your pot, including the deglazed brown bits.
- Fill your pot with filtered water. (In my large Instant Pot, this is about 5 quarts. It may be less in a crock pot or more in a stock pot.)
- Cook the stock.
- Stock Pot: Bring the ingredients to a boil and then reduce to a simmer for 4-6 hours.
- Crock Pot: Place on high for 4-6 hours.
- Instant Pot: Seal the lid and close the vent. Hit “soup” and set the timer for 30 minutes. Be sure the pressure is set to “high.” When the 30 minutes is up, allow the pot to depressurize naturally.
- Ladle the contents into various mason jars. I use quart and pint sized. (Jars may be frozen after cooling in the refrigerator IF they have room to expand. Be sure that each jar has an inch and a half of room at the top. I usually fill to just below the curve of the jar….If a bit of sediment in the jars will bother you, filter the stock first.)
- Cool the jars completely in the refrigerator. (Leave the jars overnight before moving to the freezer.)
- Freeze the jars. (I occasionally lose a jar and its contents to cracking in the freezer, but for the most part freezing has allowed me to keep massive quantities of stock on hand for easy use. Take jars out to defrost as needed for cooking.)
 Here on SpringForestFarm.com, Jennifer Taylor Schmidt writes beef recipes for the busy,
natural homemaker. It is possible to seek optimal health with limited time and money. Join
Jennifer in future posts as she explores the possibilities found in a 1/4 and a 1/2 beeve. You
can also find her thoughts and personal health journey on RealFoodRealHealing.com.
Great post. I need to find a farm like Julie’s down here near me in Texas.
LikeLiked by 1 person
Just lovely! I can’t wait to make this.
LikeLiked by 1 person