
The Challenge
I’ll be honest. Ribs are not a food I typically crave. They’re messy. I’m not into messy. I find that rib-joint ribs are often more fat than meat. That’s not my thing either. Creating this recipe was my first experience with ribs at home. I did a lot of reading before dabbling in the kitchen. My goal was to create a rib recipe for the rib-lovers in my family, but also to create something that I (a non-rib lover) would equally enjoy. In the end, I succeeded. Or maybe I realized that I’m a rib-lover after all. I just needed the right recipe.
Remove the Membrane
Because this was my first time cooking ribs at home, I had to learn how to prepare the meat. Every source I read unanimously stressed the importance of first removing the membrane. It takes a little patience, a blunt kitchen tool, and a good tug, but the end result allows for a clean surface on which to apply your seasoning or rub. More importantly, removing the membrane allows for a pleasing texture when eating. If you choose not to remove the membrane, you’ll find that the bottom of your ribs have a rubbery texture once cooked. It’s not pleasant, and hard to chew. For what it’s worth, the membrane is always removed in barbecue competitions. A pit master will never win with it left intact.
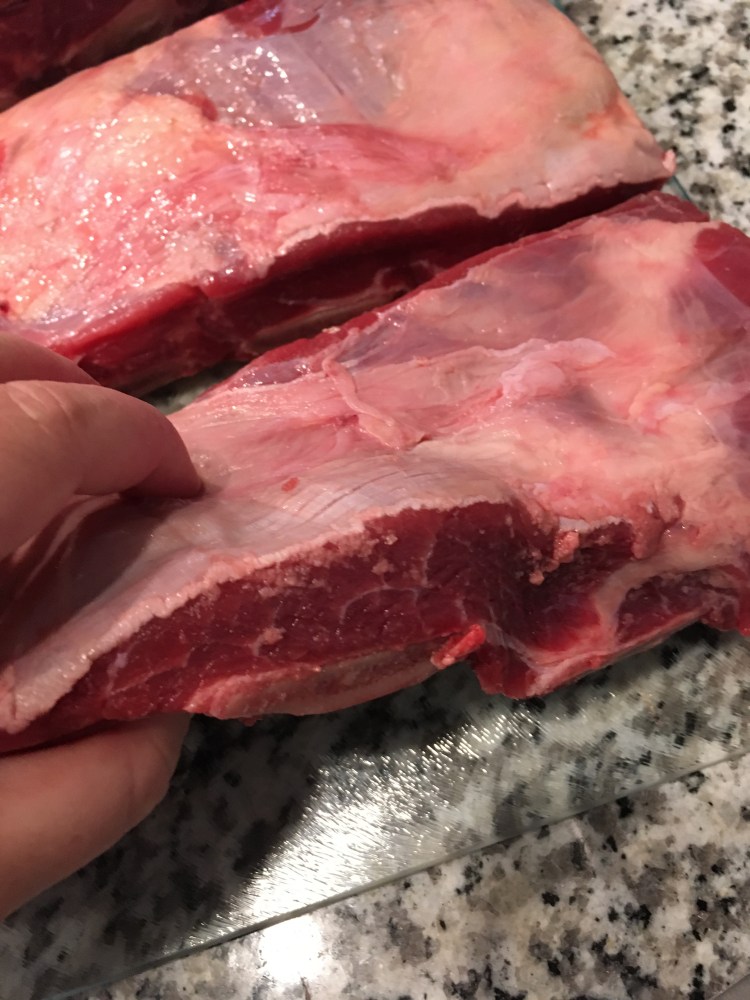
As packaged, the ribs will likely have a fat layer across the top as well as a metallic looking membrane beneath the bones.
To remove the membrane, place the ribs on a cutting board bone side up. The rack will appear to be concave. The silver membrane is very slippery. It’s best not to use a sharp knife. With a butter knife or spoon, insert the tool just beneath the membrane at one end of the ribs. Lift the membrane up until you can grab it with your fingers or get your fingers beneath. At this point, you just need to tug hard to peel the membrane back. You might find it easier to grab the membrane with a paper towel so that your fingers don’t slip. For visual learners, this quick one minute video may help you get the idea.
Trim the Fat
My Spring Forest Farm ribs were beautifully marbled with enough fat to produce a tender, fall apart set of ribs. Because of that, and because my personal preference is for more meat than fat, I liberally trimmed fat from the top of the ribs. Using a fillet knife, I took off as much fat as I could, with the intention of seeing red meat all along the top before applying the rub.

Use a sharp filet knife to remove excess fat.
It’s All About the Rub
After prepping both sides, I rubbed both the top and bottom of the ribs with the seasoning rub. Because my husband likes things spicy and loves ribs, I tried to cater to his taste for this recipe. The rub has some heat! After liberally applying the rub, I placed the ribs bone side down on a large, parchment lined, high-rimmed baking sheet. The lip or rim will help to keep the juices from leaking into the oven. Once everything was in place, I sealed the pan with a piece of tin foil.
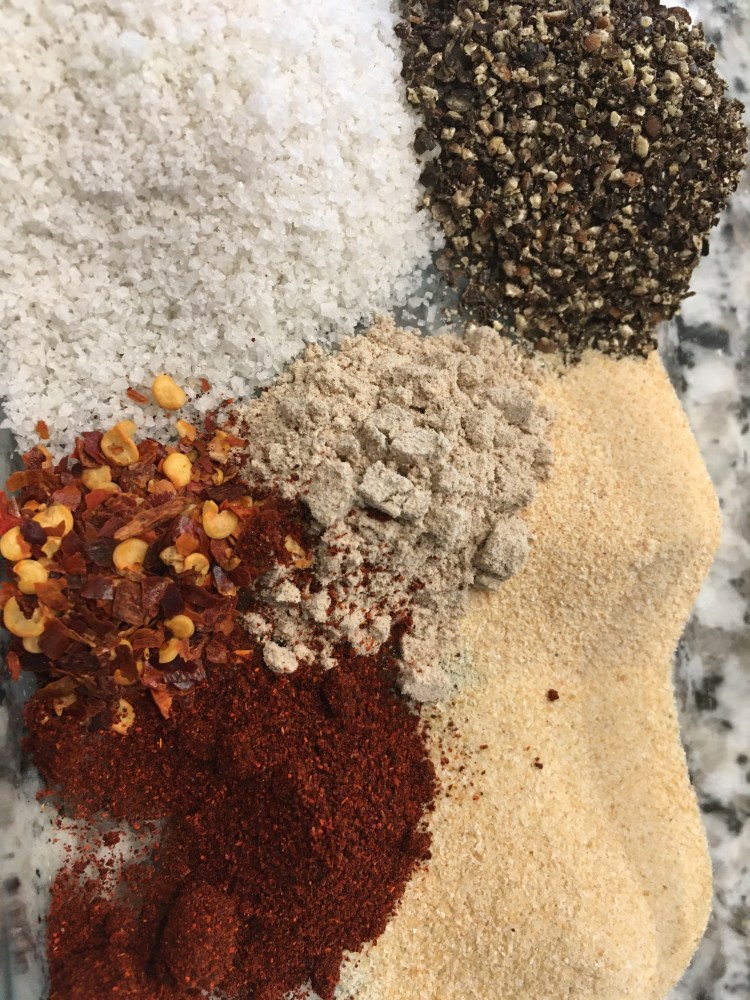
This spicy rub includes Celtic sea salt, black pepper, garlic powder, onion powder, white pepper, chipotle powder and red pepper flakes.

Liberally apply the rub to the top and bottom of the ribs.
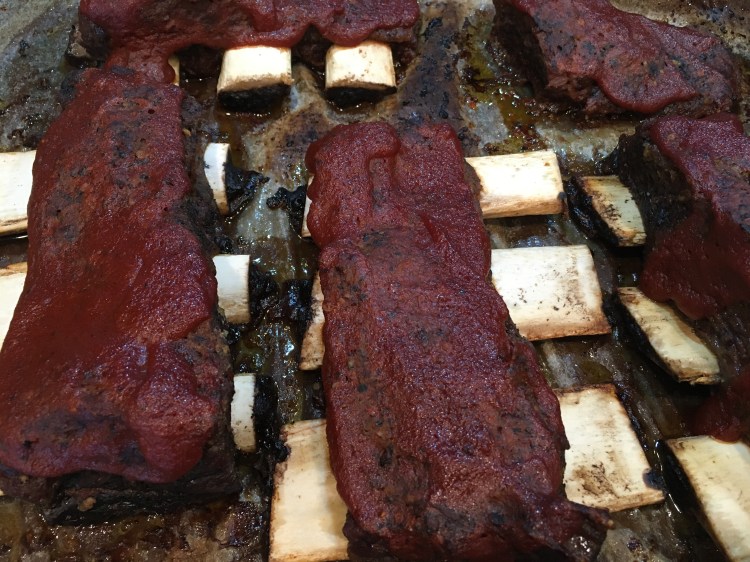
Low and Slow
From all the reading I did, I learned that the rib game is about going low and slow. Whether you choose a grill, a smoker, or the oven, they need a lot of time. For this recipe, I used my oven set to just 250F. I shut them in and left them completely alone for three and a half hours. At that point, I removed the ribs, opened the foil, and applied a thick layer of barbecue sauce. To caramelize the sauce, I put them back into the oven under the broiler, without the foil cover.

This is what your ribs may look like after three and a half hours of low and slow cooking.
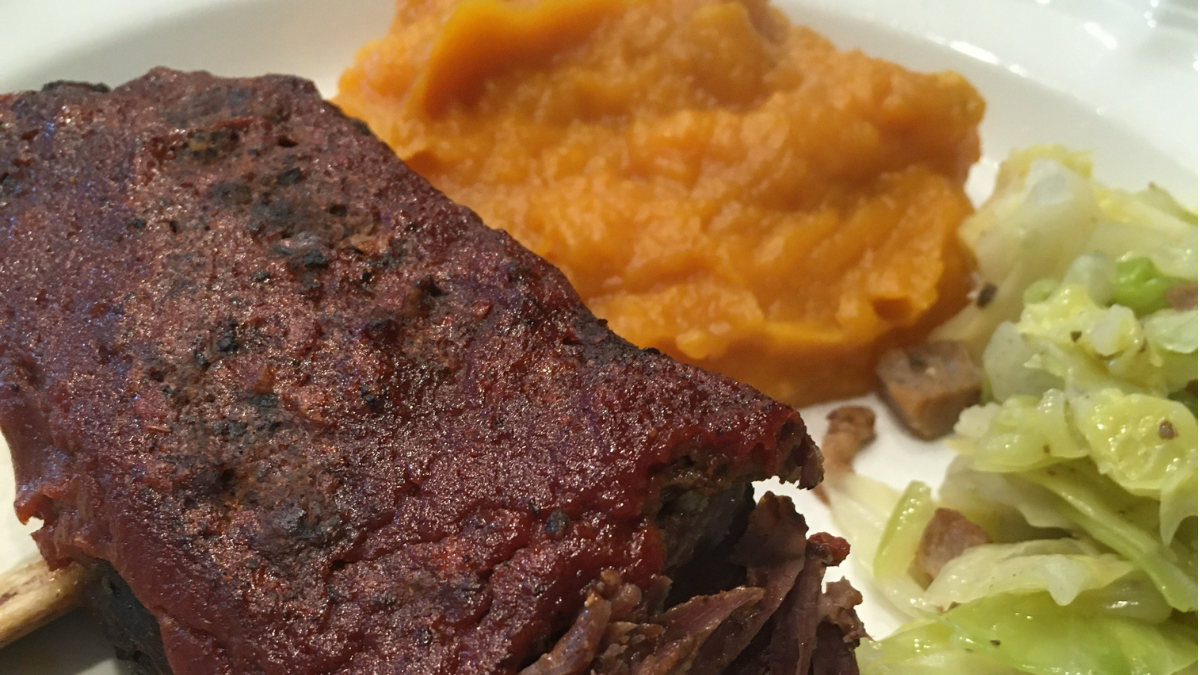
Maybe it’s All About the Sauce
Before we move on to the recipe, I want to talk about the sauce a bit. My family became a sugar free household several years ago. It is really hard to find a good barbecue sauce without sugar, brown sugar, or corn syrup. When I was first searching for an alternative, I ran into Danielle Walker’s recipe. She uses dates to sweeten her tomato based sauce. I’ve since taken her recipe and made it my own, using flavors that my family prefers. Either option would be an excellent, sugar-free, addition to your homemade ribs.
Use the broiler to caramelize the barbecue sauce of your choice as a finishing touch.
Be Brave
I hope that as I write recipes here, you are encouraged and empowered to take charge of your kitchen and customize recipes to meet your personal tastes and preferences. Enjoy the recipe. Adapt and make it your own!
Spicy Short Ribs
Ingredients
FOR THE RUB:
– 1 heaping Tbsp fine ground Celtic sea salt
– 1 Tbsp black pepper
– 1 tsp garlic powder
– 1 tsp onion powder
– 1 tsp white pepper
– 1 tsp chipotle pepper
– 1/2 tsp red pepper flakes
FOR THE BARBECUE SAUCE:
– 4 large pitted dates
– 1/4 c boiling water
– 1 15 oz can tomato sauce
– 3 oz tomato paste
– 1/2 c apple cider vinegar
– 2 Tbsp soy sauce or substitute
– 1 tsp fine ground Celtic sea salt
– 1 tsp chili powder
– 1 tsp chipotle powder
– 1/2 tsp garlic powder
– 1/2 tsp onion powder
– 1/2 tsp ground mustard
– dash of cloves
– (optional 1/2 tsp cayenne for extra heat)
FOR THE SHORT RIBS:
– 4 lbs short ribs (estimate about a pound per person)
– parchment paper
– rimmed baking sheet
– tin foil
Directions
- For the rub:
- Combine all ingredients and mix
- For the barbecue sauce:
- Soak the four pitted dates in the boiling water for ten minutes or until soft, and then drain the water.
- Place the softened dates and all other ingredients into a blender and combine.
- Set the sauce aside for later use. For this recipe, I only needed 1/3 of the sauce as made. I split the rest into two pint jars and froze for another day. If freezing in pint jars, be sure to leave at least an inch of space at the top for expansion.
- For the short ribs:
- Remove the membrane from the bone side of the ribs. (See above for details)
- Trim fat from the top of the ribs as desired. (See above for details.)
- Liberally coat both sides of the ribs in rub.
- Place the ribs bone side down on a large, parchment lined, high-rimmed baking sheet. The lip or rim will help to keep the juices from leaking into the oven.
- Cover the pan in foil.
- Place the ribs in a 250F oven for three and a half hours.
- When the ribs are fall-apart tender, remove from the oven and coat in barbecue sauce.
- Return the ribs to the oven under a high broiler. This will caramelize the sauce. Keep a constant eye on them so they don’t burn. They will be done quickly.
- I suggest serving with classic sides like mashed sweet potatoes and braised cabbage. Enjoy!

Here on SpringForestFarm.com, Jennifer Taylor Schmidt writes beef recipes for the busy, natural homemaker. It is possible to seek optimal health with limited time and money. Join Jennifer in future posts as she explores the possibilities found in a 1/4 and a 1/2 beeve. You can also find her thoughts and personal health journey on RealFoodRealHealing.com.

I love anything that is spicy.
LikeLiked by 1 person